How To Set Up A Simple Vivarium
In this section we show you how to set up a simple vivarium, that would be suitable for small snakes or lizards like leopard geckos.
To make it easy we have taken a series of photographs, that show the equipment and different stages that are needed to make the vivarium a suitable environment for your pet.
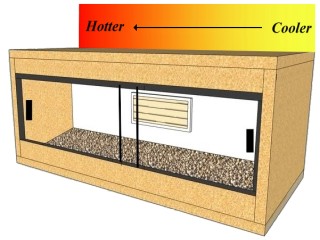
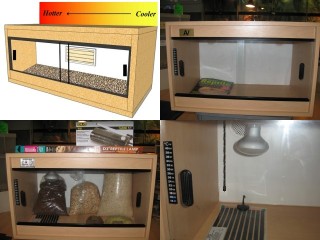
The Temperature Gradient
Before we start, there is one important concept that you must understand. That is the temperature gradient.As reptiles are cold blooded they do not generate their own body heat, instead they derive it from their surroundings. To attain the correct temperature they use a method called thermoregulation, which basically means they move to hotter or colder places, depending on their needs.
To allow them to do this in a vivarium, it is necessary to create a temperature gradient, one end of the tank is hotter than the other. The reptile will then choose the spot that best suits its current temperature requirements.
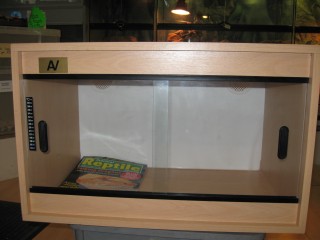
The Bare Vivarium
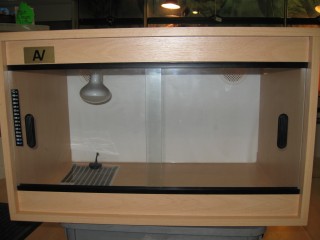
Here we have a standard wooden vivarium that is very common in the hobby.We have placed a magazine in tank so that you can gauge the scale.
Also, please note that we have already added our first piece of equipment, This is a stick on thermometer, which is needed to check that temperatures are correct.
The Heat Mat
If you look at the floor of the vivarium you will see a black coloured mat.This is called a heat mat and is one part of the heating system for this tank.
The heat mat should ideally cover one-third of the floor space, but as this vivarium is quite small and will be situated in a hot area we are covering a quarter of the floor.
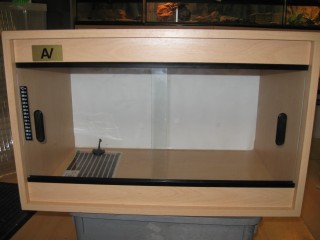
The Spot Light
Looking at the roof you will see that we have attached a spot light.As you have probably already guessed, this is going to be the hot end of the tank.
The light serves two purposes, firstly to let you and the reptile see in the tank, but it also serves a second purpose acting as a heat source.
As this is going to be used to house young lizards, there is no danger of them getting too close to the bulb. If this was a possibility we would also have fitted a cage around the spot light.
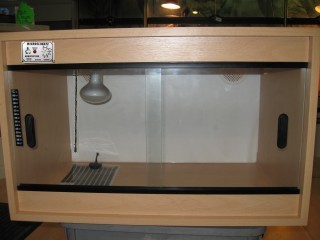
The Thermostat
The next piece of equipment we have fitted is a thermostat.You will see it mounted on the front of the vivarium and we have set it to maintain the correct temperature. You can place this anywhere convenient, but make sure that the heat setting cannot be accidentally altered, either by being knocked or by children.
If you look at the back of the tank you will see the temperature probe. We have secured this against the vivarium wall and placed the end of the probe at the point where we want to control the temperature.
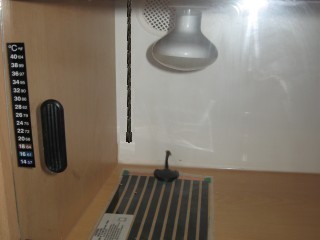
A Close Up
Here we have taken a close up picture of what we have done so far.You can see the various components and the small hole we made for the flex for the heat mat.
If you are housing very small snakes then make sure that the hole is not big enough for them to escape. If in doubt use a dab of non-toxic sealant.
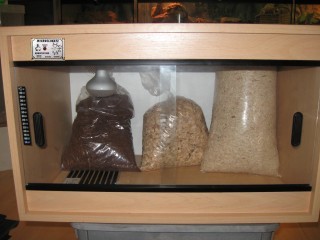
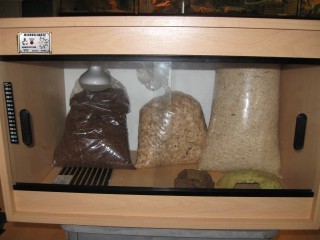
The Substrate
Now that we have fitted all the electrical equipment it is time to add floor cover.The material that is used to cover the floor of a vivarium is called substrate. It is available in a few different forms, so here we have placed some bags to give you an idea of what is available.
Water Bowl And Hide
The vivarium needs two other pieces of essential equipment, a bowl to keep the reptiles water in and a suitable hiding place.There are many different styles and sizes of bowls and hides available, so we have just put something suitable for the tank.
The one thing to note is that these will be either at the cool end of the temperature gradient or midway. We will keep the water away from the electrical equipment!
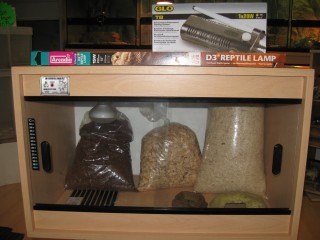
Ultraviolet Lighting
If you reptile requires ultraviolet light then you will need to supply this via either an ultraviolet spot light or strip lighting.On the top of the tank we have place the two pieces of equipment that you would need to install a strip light, the starter unit and the light itself.
Our tank is complete!